Complete Setup Guide
Step-by-step instructions to get your DNS-Mixer up and running, from ESP8266/ESP32 configuration to router and device setup.
Quick Start Overview
1. Setup ESP
Flash firmware and configure WiFi
2. Configure Router
Set DNS-Mixer as network DNS
3. Setup Devices
Configure individual devices
4. Verify
Test DNS resolution
ESP8266/ESP32 Setup
Prerequisites
Hardware Required
- ESP8266 or ESP32 board
- SSD1306 OLED display (128x64)
- Micro-USB cable
- 3.3V power supply
Software Required
- Python 3.x
- esptool for flashing
- mpy-cross compiler
- Terminal/Command prompt
Network Requirements
- WiFi network access
- DHCP-enabled router
- Available IP address
- Internet connectivity
Hardware Wiring
Connect the SSD1306 OLED display to your ESP board:
| OLED Pin | ESP8266 Pin | ESP32 Pin | Description |
|---|---|---|---|
| VCC | 3.3V | 3.3V | Power supply |
| GND | GND | GND | Ground |
| SCL | GPIO 5 (D1) | GPIO 22 | I2C Clock |
| SDA | GPIO 4 (D2) | GPIO 21 | I2C Data |
Important Notes
- Use 3.3V, not 5V power for the OLED display
- Double-check pin connections before powering on
- ESP32 may require different I2C pins depending on the board variant
Method 1: Automated Setup (Recommended)
1. Install Dependencies
2. Clone and Build
3. Configure WiFi
Edit the WiFi settings in code/main.py:
4. Flash to ESP
Method 2: Manual Setup
1. Install MicroPython Firmware
2. Alternative: Thonny IDE
- Install Thonny IDE
- Open Thonny and connect to your ESP board
- Go to Tools → Options → Interpreter
- Select MicroPython (ESP8266/ESP32)
- Thonny will install the firmware automatically
3. Upload Code
Testing Your Setup
Expected Behavior
- Boot Sequence: OLED shows "Connecting..." with progress animation
- WiFi Connection: Display shows "WiFi Connected!" briefly
- Ready State: Shows "DNS Server Ready" and IP address
- DNS Requests: LED blinks and OLED shows processing status
Troubleshooting
WiFi Issues
- Check SSID and password in code
- Verify WiFi signal strength
- Try different WiFi channels
OLED Issues
- Verify I2C connections
- Check 3.3V vs 5V power
- Test different I2C pins
Router Configuration
Network-Wide DNS Setup
Configure your router to use DNS-Mixer for all devices on your network. This provides automatic protection for all connected devices.
Step 1: Find Router IP
Windows
macOS
Linux
Step 2: Access Router Admin
- Open browser and enter router IP (usually 192.168.1.1)
- Enter admin username/password (default: admin/admin)
- Navigate to DNS or Network settings
Step 3: Configure DNS
Router brand-specific instructions:
| Router Brand | Menu Path | Setting |
|---|---|---|
| ASUS | Advanced Settings → WAN → Internet Connection | Set "DNS Server" to DNS-Mixer IP |
| TP-Link | Network → WAN → Dynamic IP | Set "Primary DNS" to DNS-Mixer IP |
| Netgear | Advanced → Setup → Internet Setup | Set "DNS Address" to DNS-Mixer IP |
| Generic | DNS/Network Settings | Set Primary DNS to DNS-Mixer IP |
Individual Device Configuration
Windows Configuration
Windows 10/11
- Right-click Start → Settings (⚙️)
- Network & Internet → Status
- Change adapter options
- Right-click network → Properties
- Internet Protocol Version 4 (TCP/IPv4) → Properties
- Select "Use the following DNS server addresses"
- Preferred DNS server: [DNS-Mixer IP]
Windows 7/8
- Control Panel → Network and Sharing Center
- Change adapter settings
- Right-click connection → Properties
- Internet Protocol Version 4 (TCP/IPv4) → Properties
- Select "Use the following DNS server addresses"
- Preferred DNS server: [DNS-Mixer IP]
Command Line (All Windows)
macOS Configuration
macOS Monterey/Ventura/Sonoma
- System Settings → Network
- Select network connection
- Click Details... button
- Select DNS tab
- Click + to add DNS server
- Enter DNS-Mixer IP address
Older macOS Versions
- System Preferences → Network
- Select connection → Advanced...
- DNS tab → Click + button
- Enter DNS-Mixer IP address
Terminal Method
Linux Configuration
Ubuntu/Debian (Network Manager)
- Settings → Network
- Select connection → ⚙️ (settings)
- IPv4 tab → DNS section
- Set to Manual
- Enter DNS-Mixer IP
Ubuntu/Debian (Netplan)
Red Hat/CentOS/Fedora
Mobile Devices
Android
- Settings → Network & internet → Wi-Fi
- Long-press your Wi-Fi network
- Modify network → Advanced options
- IP settings → Static
- Scroll to DNS 1
- Enter DNS-Mixer IP
iOS/iPadOS
- Settings → Wi-Fi
- Tap ⓘ next to your network
- Configure DNS → Manual
- Delete existing DNS servers
- Tap Add Server
- Enter DNS-Mixer IP
Gaming Consoles & Smart TVs
PlayStation 4/5
- Settings → Network → Settings
- Select connection → Advanced Settings
- IP Address Settings → Manual
- DNS → Manual
- Primary DNS: DNS-Mixer IP
Xbox One/Series X|S
- Settings → Network → Network settings
- Select network → Advanced settings
- DNS settings → Manual
- Primary DNS: DNS-Mixer IP
Smart TVs
- Settings → Network → Network Status
- Select network → IP Settings
- Set DNS to Manual
- Enter DNS-Mixer IP
Verification & Testing
Test DNS Resolution
Windows
macOS/Linux
Web Browser
Expected Results
- DNS server responds from your DNS-Mixer IP
- Domain resolution completes successfully
- Websites load normally
- OLED display shows DNS activity
OLED Display Verification
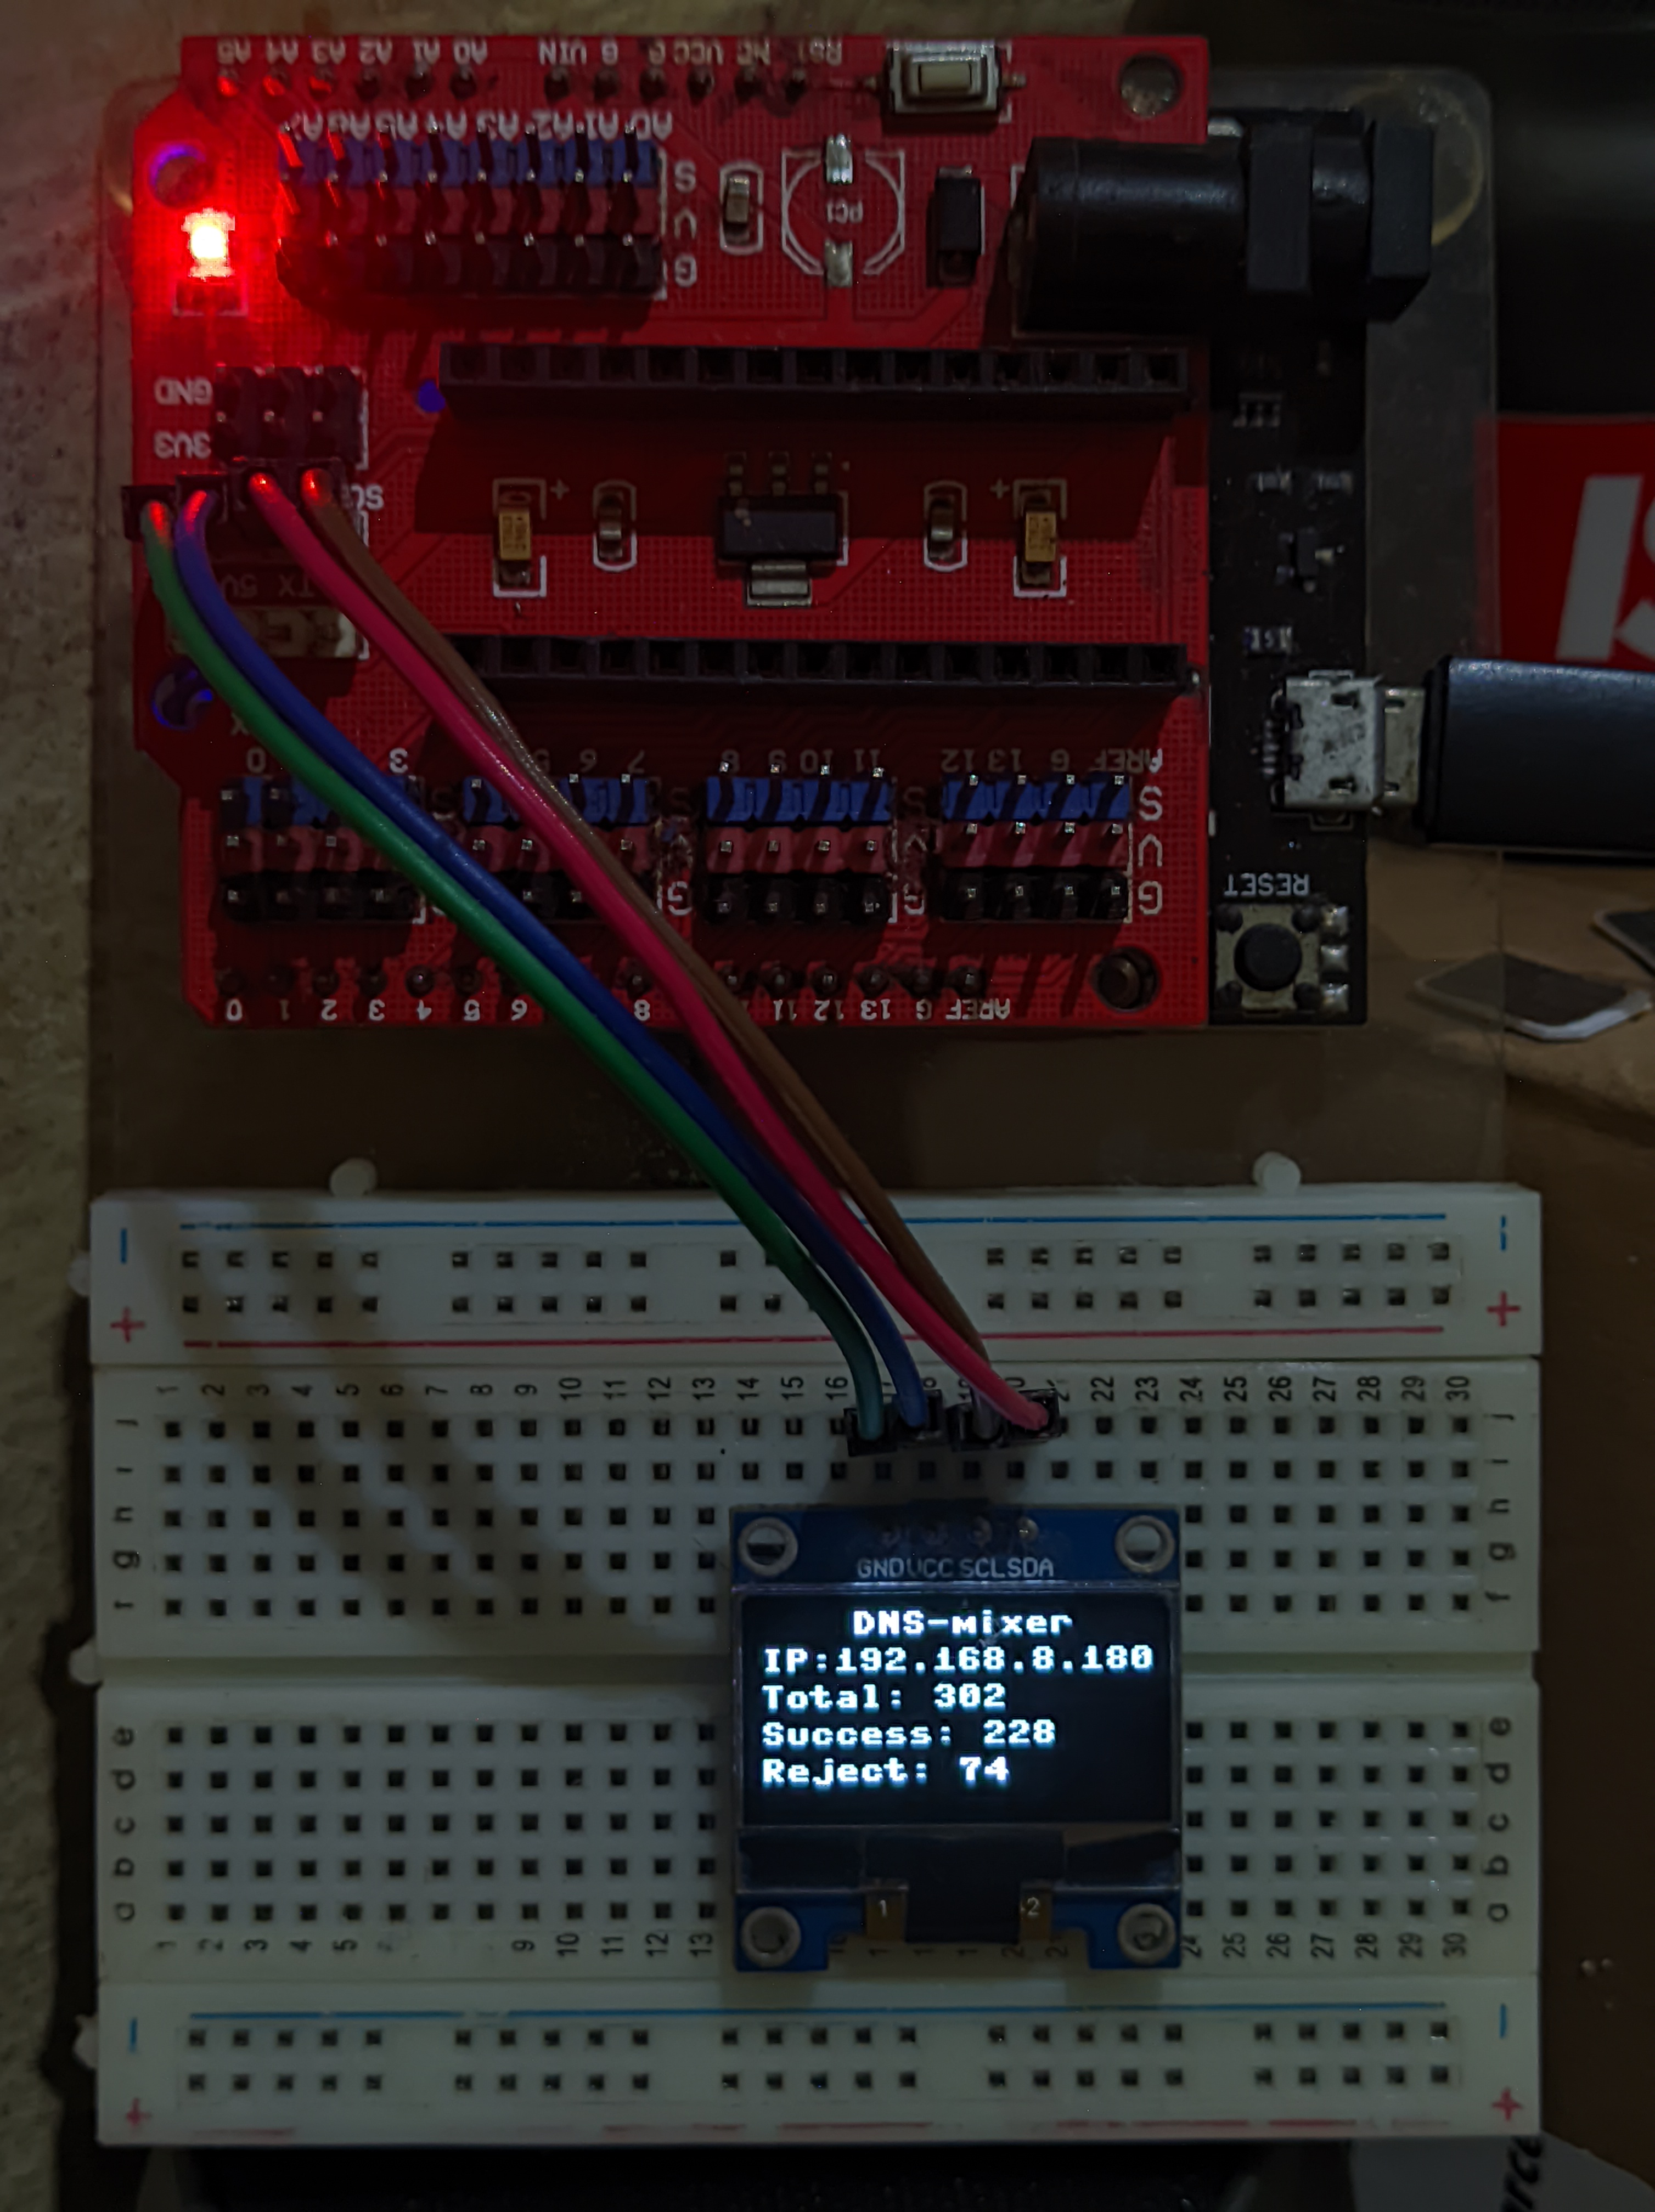
When working correctly, your DNS-Mixer OLED display should show real-time statistics similar to this demo image. The display updates automatically with each DNS request processed.
Test Bypass Functionality
Verify that DNS-Mixer can work around restrictions:
Monitor the OLED display to see which DNS providers are being used for each query.
Performance Monitoring
Check OLED Statistics
The OLED display shows real-time statistics:
- Total: Total DNS requests processed
- Success: Successfully resolved queries
- Failed: Queries that failed all providers
Expected Performance
- DNS resolution: 50-200ms average
- Success rate: 99.5%+
- LED activity: Blinks on each request
- OLED updates: Real-time status changes
Next Steps
Getting Help
If you encounter issues during setup:
- Check the detailed server setup guide for ESP configuration
- Review device configuration guide for client setup
- Verify OLED display shows "DNS Server Ready" when setup is complete
- Test with simple DNS queries before configuring router